Leverage business rules (6/6)
In this section, you’ll learn how to add decision automation to your process by using BPMN 2.0 Business Rule Tasks and DMN 1.3 Decision Tables.
Add a Business Rule Task to the Process
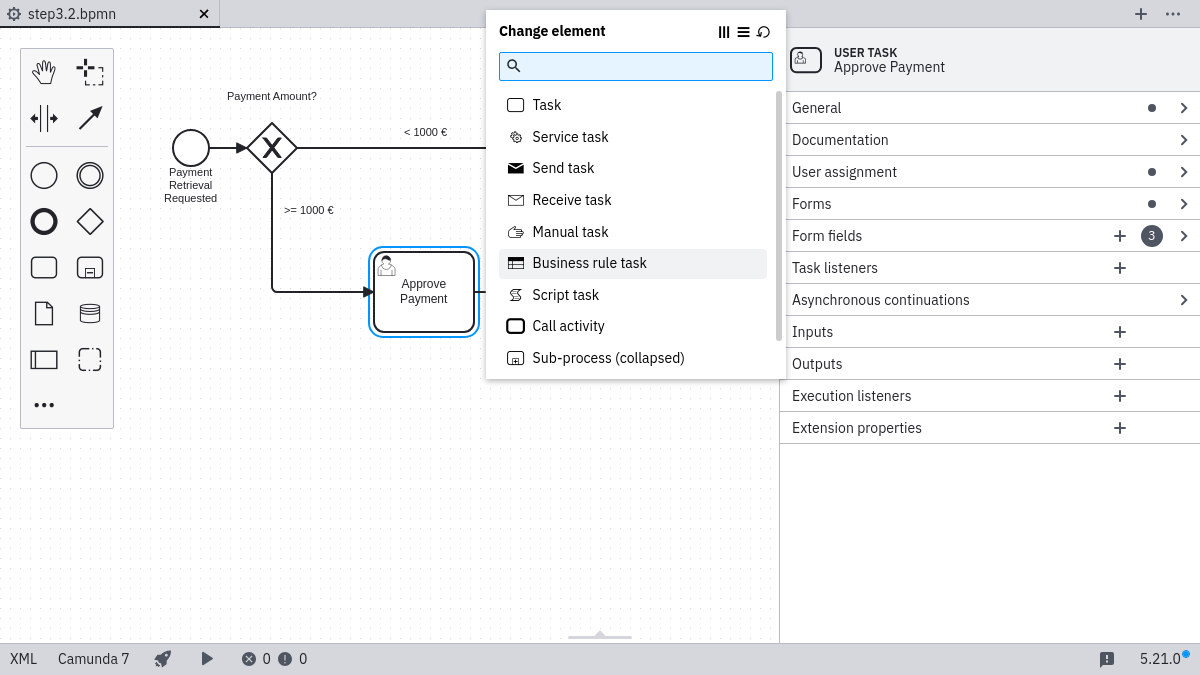
Use the Camunda Modeler to open the Payment Retrieval process then click on the Approve Payment Task. Change the activity type to Business Rule Task in the wrench button menu.
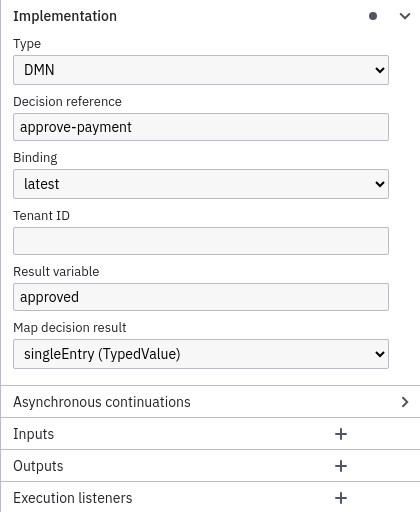
Next, link the Business Rule Task to a DMN table by changing Implementation to DMN and Decision Ref to approve-payment in the properties panel. In order to retrieve the result of the evaluation and save it automatically as a process instance variable in our process, we also need to change the Result Variable to approved and use singleEntry as the Map Decision Result in the properties panel.
Save your changes and deploy the updated process using the Deploy Button in the Camunda Modeler.
Create a DMN table using the Camunda Modeler
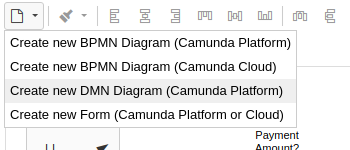
First, create a new DMN diagram by clicking File > New File > DMN Diagram.
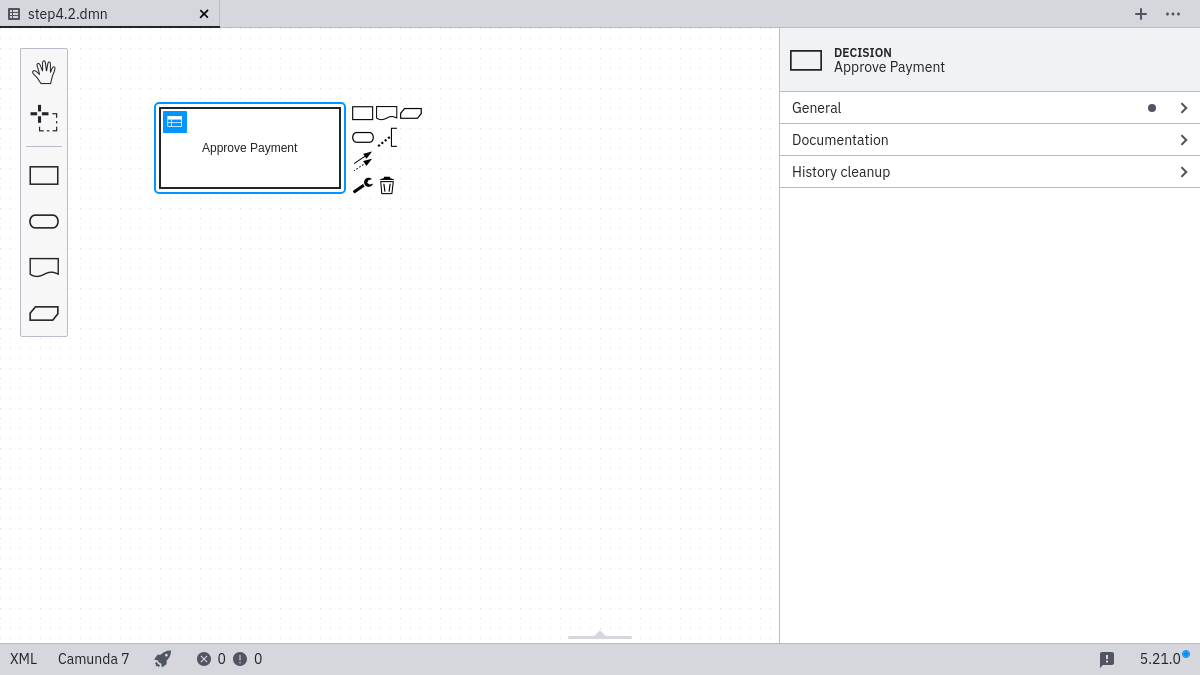
Now the newly created diagram will already have a decision element added to it. Select it by clicking it and then give it a name of Approve Payment and an ID of approve-payment (the decision ID must match the the Decision Ref in your BPMN process).
Next, create a new DMN table by clicking the table button.
Specify the DMN table
First, specify the input expressions for the DMN table. In this example, we’ll decide whether a payment is approved based on the item name. Your rules can also make use of the FEEL Expression Language, JUEL or Script. If you like, you can read more about Expressions in the DMN Engine.
Double click Input to configure the input column. Use Item as the Input Label and item as the Input Expression:

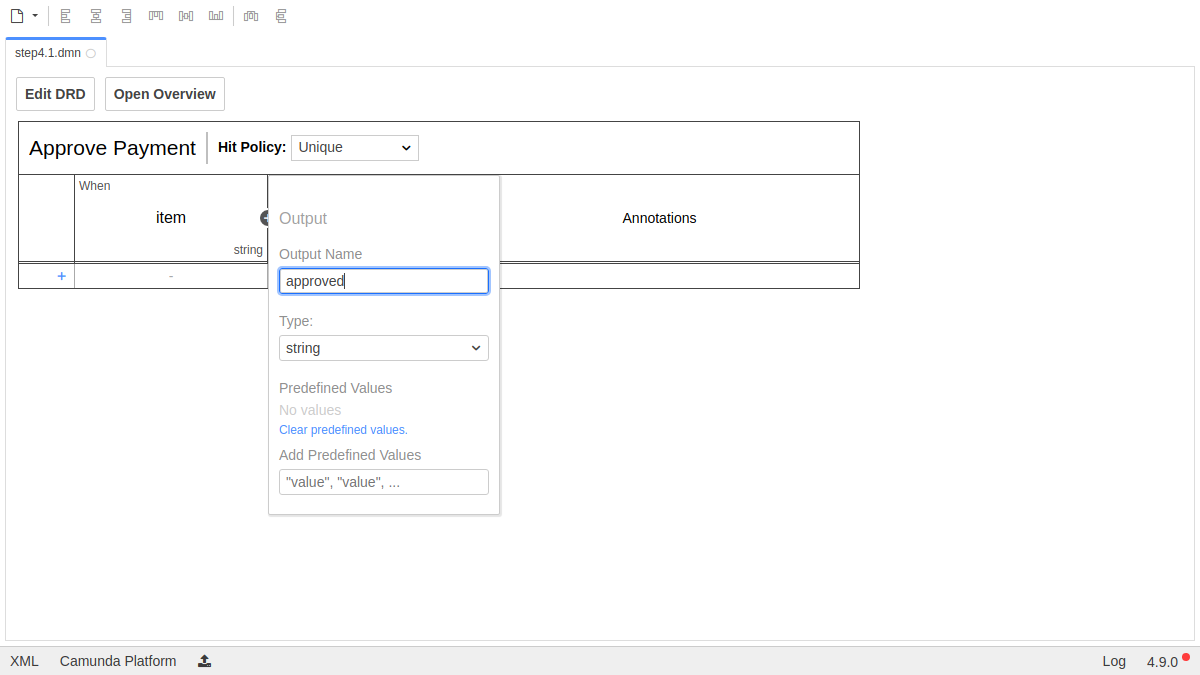
Next, set up the output column. Use Approved as the Output Label and approved as the Output Name for the output column “Approved”:
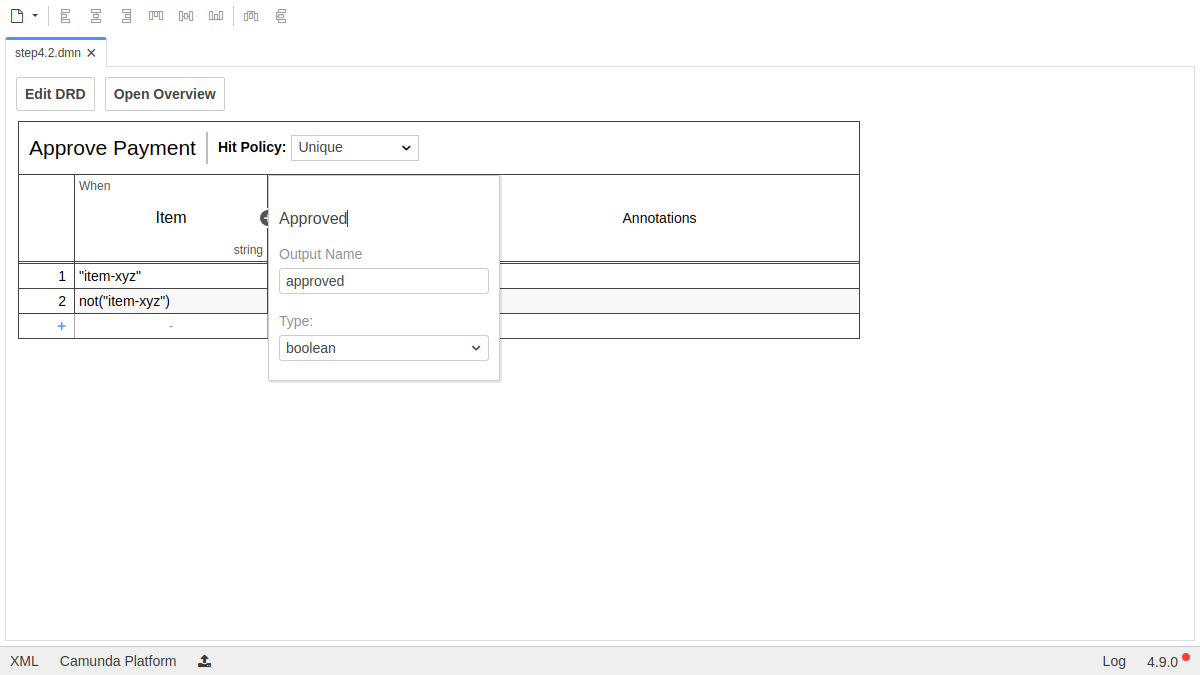
Let’s create some rules by clicking on the plus icon on the left side of the DMN table. We should also change the Output Column to the Data Type boolean:
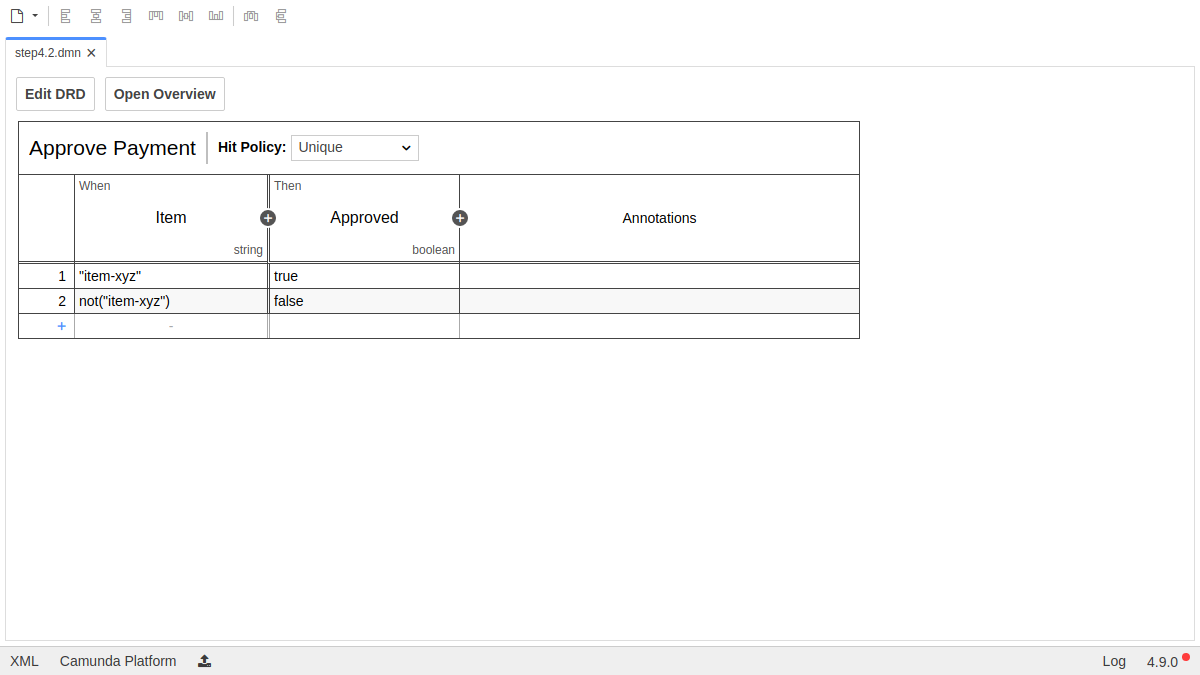
After setup, your DMN table should look like this:
Deploy the DMN table
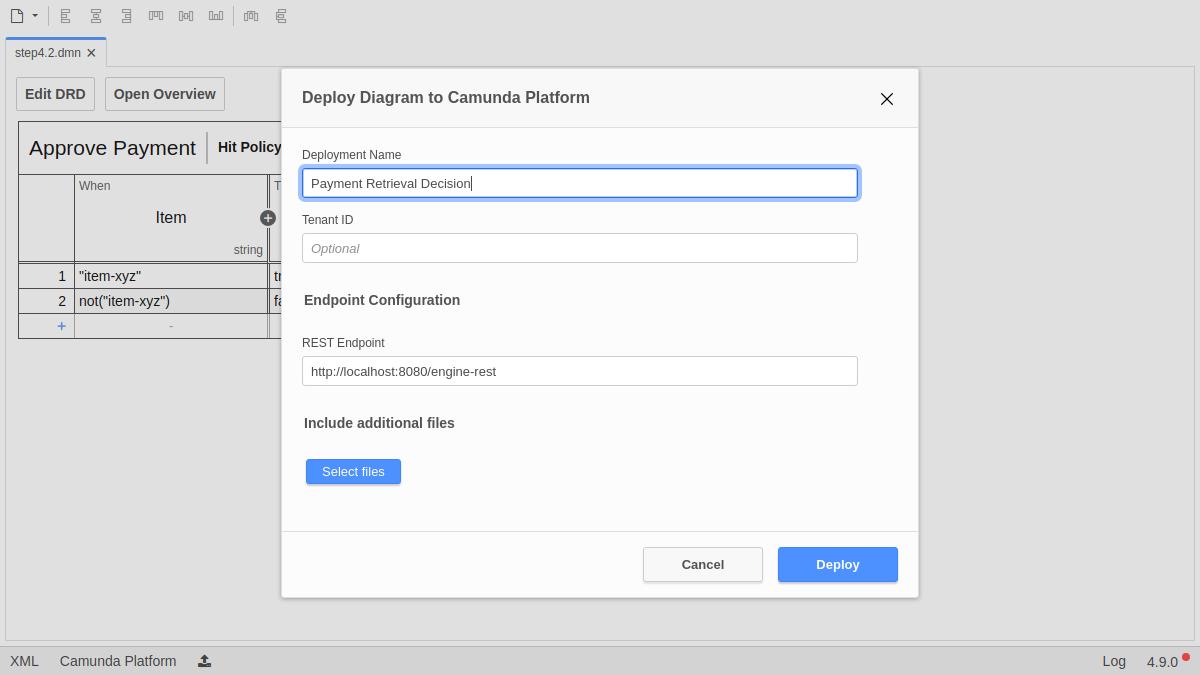
To deploy the Decision Table, click on the Deploy button in the Camunda Modeler, give it Deployment Name “Payment Retrieval Decision”, then hit the Deploy button.
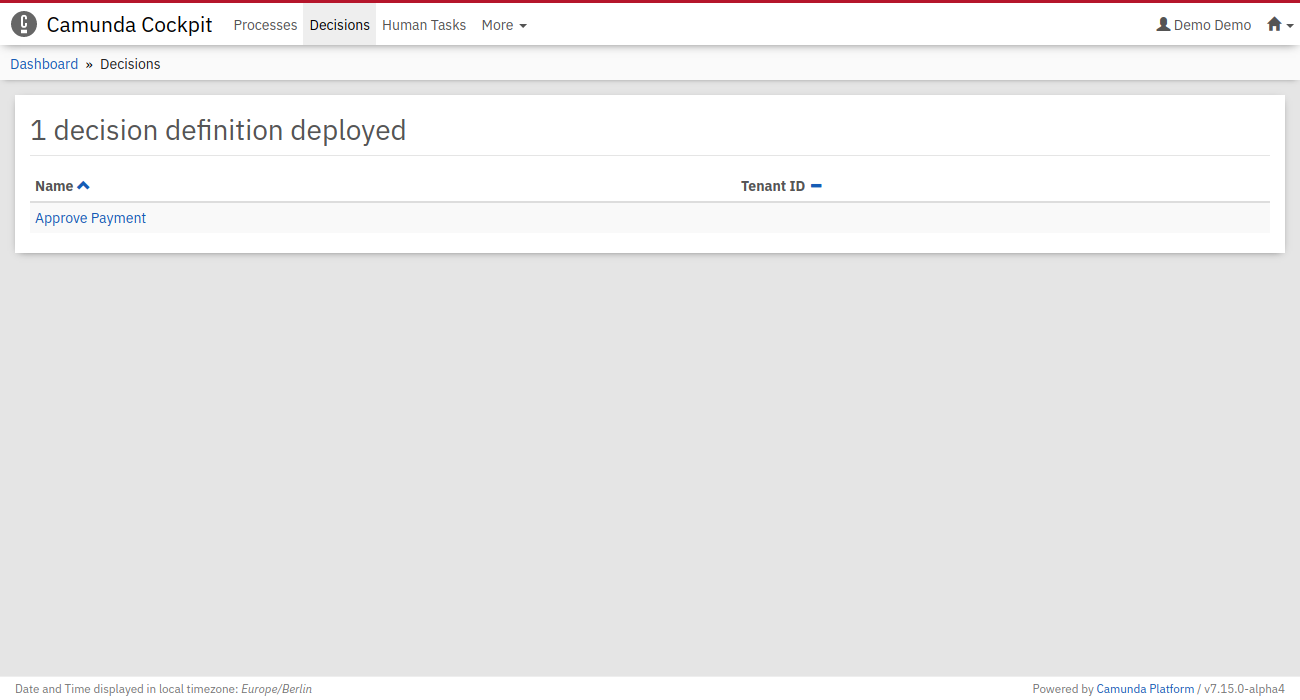
Verify the Deployment with Cockpit
Now, use Cockpit to see if the decision table was successfully deployed. Go to http://localhost:8080/camunda/app/cockpit/. Log in with the credentials demo / demo. Navigate to the “Decisions” section. Your decision table Approve Payment should be listed as deployed decision definition.
Inspect using Cockpit and Tasklist
Next, use Tasklist to start two new Process Instances and verify that depending on your input, the Process Instance will be routed differently. To do so, go to http://localhost:8080/camunda/app/tasklist/. Log in with demo / demo.
Click on the
button to start a process instance and choose the Payment process.
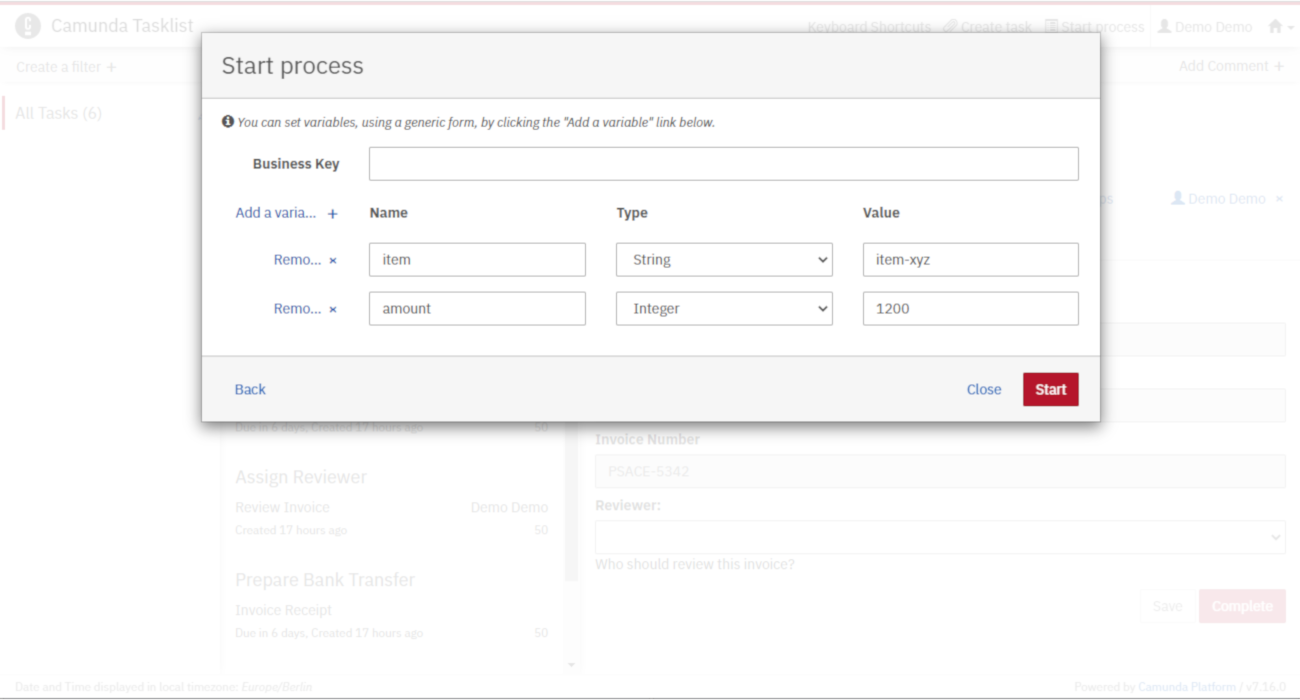
Use the generic form to add the variables as follows:
Hit the Start Instance button.
Next, click again on the
button to start another process instance and choose the Payment process.
Use the generic form to add the variables as follows:

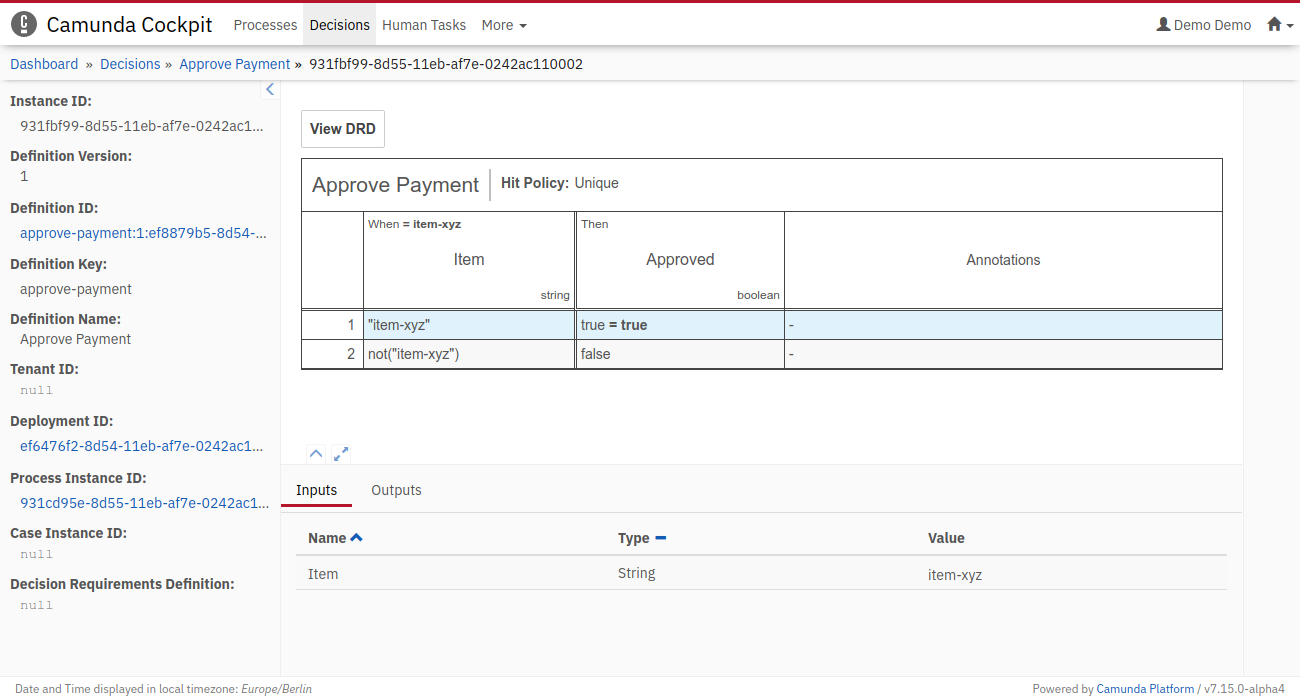
You’ll see that depending on the input, the worker will either charge or not charge the credit card. You can also verify that the DMN tables were evaluated by using Camunda Cockpit. Go to http://localhost:8080/camunda/app/cockpit/. Log in with the credentials demo / demo. Navigate to the “Decisions” section and click on Approve Payment. Check the different Decision Instances that were evaluated by clicking on the ID in the table.
A single DMN table that was executed could look like this in Camunda Cockpit:
Success!
Congratulations! You’ve successfully completed the Camunda Platform Quick Start. Ready to continue? We recommend the Camunda Platform documentation.
Catch up: Get the Sources of Step-5.
Download as .zip or checkout the corresponding tag with Git.
You can checkout the current state from the GitHub repository.
If you have not cloned the repository yet, please execute the following command:
git clone https://github.com/camunda/camunda-get-started-quickstart.git
To checkout the current state of the process application please execute the following command:
git checkout -f Step-5Or download as archive from here.