Invoking a Spring Bean from a BPMN 2.0 Service Task
In this section we learn how to start a process from a Spring Bean and how to invoke a Spring Bean from a BPMN 2.0 Service Task.
Add a Spring Bean Service Task
Now that we know how to bootstrap the process engine in a Spring Application context, we can add a BPMN 2.0 process model and interact with the process form inside our Spring beans. In this section we will
- Model an executable BPMN 2.0 process.
- Use Spring auto-deployment for BPMN 2.0 processes.
- Start a process instance from a Spring bean.
- Invoke a Spring bean from a BPMN 2.0 Service task.
Model an Executable BPMN 2.0 Process
Start by modeling an executable process using the Camunda Modeler. The process should look as depicted in the screenshot below.
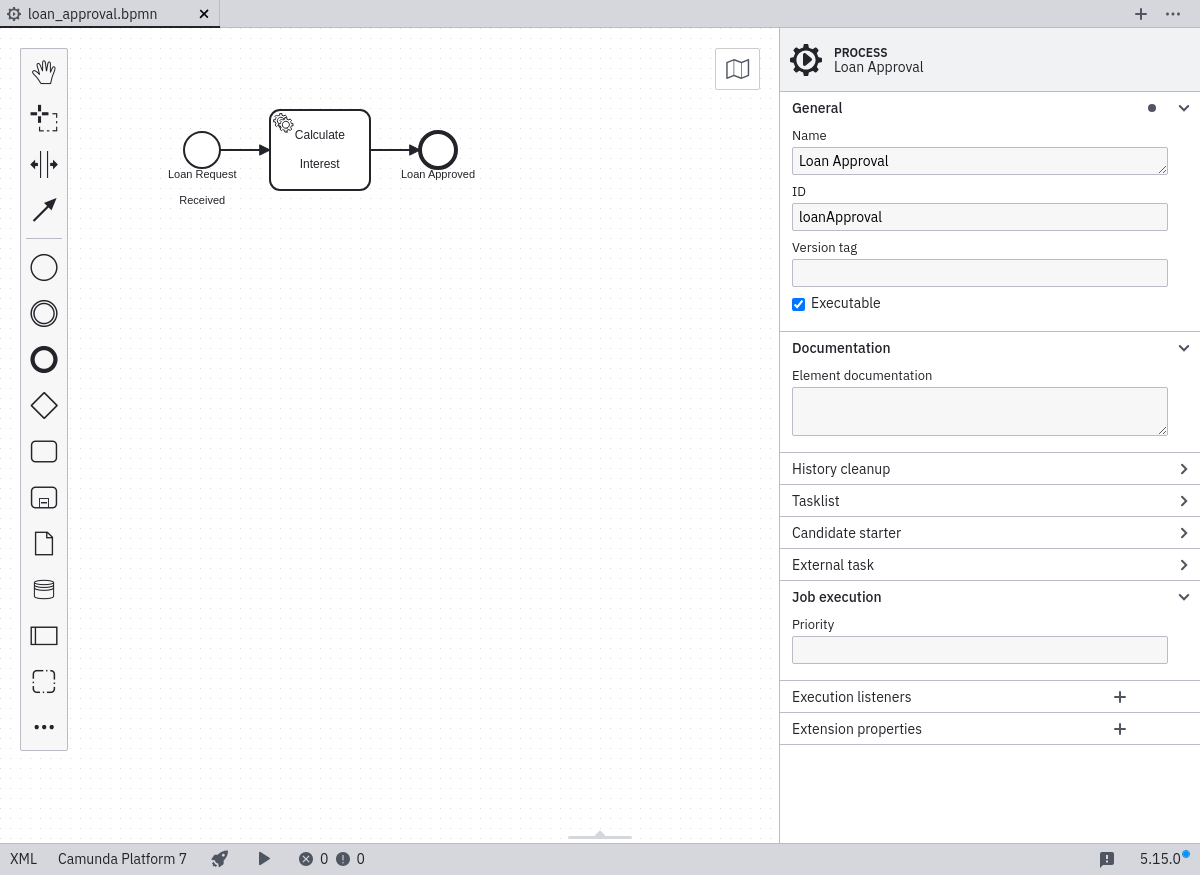
Hint
If you are unfamiliar with modeling an executable process, you can read the Model a Process section of the Quick Start tutorial.
When you are done, save the process model in the src/main/resources folder of your Eclipse project. Make sure to refresh the Eclipse project afterwards.
Use Spring Auto-Deployment for BPMN 2.0 Processes
For the process to be deployed, use the auto-deployment feature provided by the Camunda engine Spring integration. In order to use this feature, modify the definition of the SpringProcessEngineConfiguration bean inside LoanApplicationContext as follows:
@Bean
public SpringProcessEngineConfiguration engineConfiguration(
    DataSource dataSource,
    PlatformTransactionManager transactionManager,
    @Value("classpath*:*.bpmn") Resource[] deploymentResources) {
  SpringProcessEngineConfiguration configuration = new SpringProcessEngineConfiguration();

  configuration.setProcessEngineName("engine");
  configuration.setDataSource(dataSource);
  configuration.setTransactionManager(transactionManager);
  configuration.setDatabaseSchemaUpdate("true");
  configuration.setJobExecutorActivate(false);
  configuration.setDeploymentResources(deploymentResources);

  return configuration;
}
(the import for the Resource interface is org.springframework.core.io.Resource)
Start a Process Instance from a Spring Bean
The next step consists of starting a process instance from a Spring Bean. Add a class called Starter to the org.camunda.bpm.getstarted.loanapproval package:
package org.camunda.bpm.getstarted.loanapproval;

import org.camunda.bpm.engine.RuntimeService;
import org.springframework.beans.factory.InitializingBean;
import org.springframework.beans.factory.annotation.Autowired;

public class Starter implements InitializingBean {

  @Autowired
  private RuntimeService runtimeService;

  public void afterPropertiesSet() throws Exception {
    runtimeService.startProcessInstanceByKey("loanApproval");
  }

  public void setRuntimeService(RuntimeService runtimeService) {
    this.runtimeService = runtimeService;
  }
}
This will simply add a Spring Bean to the application context, which injects to the process engine and starts a single process instance from an afterPropertiesSet() method.
Add the Spring bean to the LoanApplicationContext class:
@Configuration
public class LoanApplicationContext {

  ...

  @Bean
  public Starter starter() {
    return new Starter();
  }
}
Invoke a Spring Bean from a BPMN 2.0 Service Task
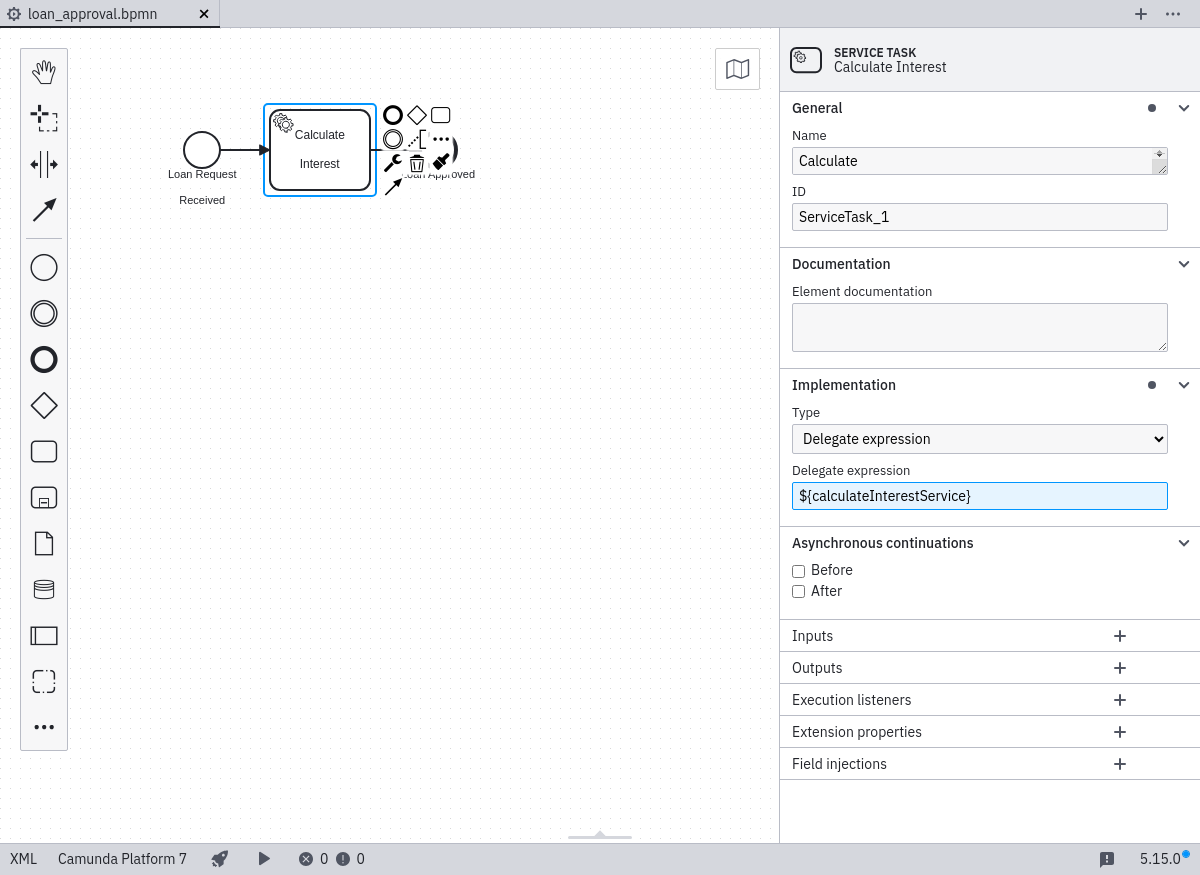
Referencing a Spring Bean from a BPMN 2.0 Service Task is simple. As shown in the screenshot above, we have to select the service task in the Camunda Modeler and provide an expression. Set Implementation Type to Delegate Expression and type ${calculateInterestService} in the Delegate Expression field. Again, save the model and refresh the Eclipse project.
Finally, we add the Java class implementing the JavaDelegate interface.
package org.camunda.bpm.getstarted.loanapproval;

import org.camunda.bpm.engine.delegate.DelegateExecution;
import org.camunda.bpm.engine.delegate.JavaDelegate;

public class CalculateInterestService implements JavaDelegate {

  public void execute(DelegateExecution delegate) {

    System.out.println("Spring Bean invoked.");

  }

}
And register it as a Spring Bean in the application context.
@Configuration
public class LoanApplicationContext {

  ...

  @Bean
  public Starter starter() {
    return new Starter();
  }

  @Bean
  public CalculateInterestService calculateInterestService() {
    return new CalculateInterestService();
  }
}
If you redeploy the application, you should see the following message in the logfile, meaning that the service task was executed.
INFO org.camunda.commons.logging.BaseLogger.logInfo
ENGINE-00001 Process Engine engine created.
Spring Bean invoked
INFO org.springframework.web.context.ContextLoader.initWebApplicationContext
Root WebApplicationContext: initialization completed in 3050 ms
Catch up: Get the Sources of Step-3.
Download as .zip or checkout the corresponding tag with Git.
You can checkout the current state from the GitHub repository.
If you have not cloned the repository yet, please execute the following command:
git clone https://github.com/camunda/camunda-get-started-spring.git
To checkout the current state of the process application please execute the following command:
git checkout -f Step-3Or download as archive from here.