Create a DMN Decision Table
In this section you learn how to create your first DMN Decision Table with the Camunda Modeler. The table will contain the decision logic about the desired dish for a given season and guest count.
Now start up the Camunda Modeler.
Create a new Decision Diagram
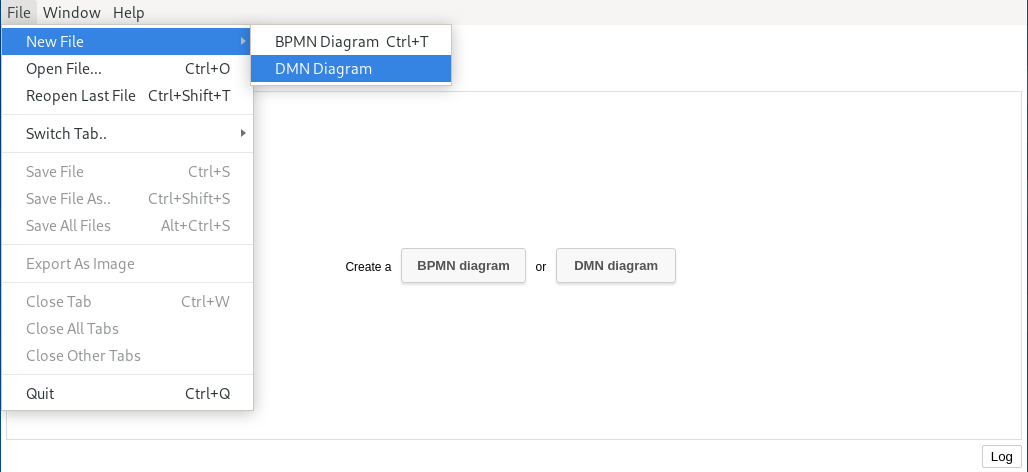
Create a new DMN diagram by clicking File > New File > DMN Diagram.
Start with the Table Header
Start by setting the name and the id of the decision. Select the decision, open the Properties Panel on the right side and change the text to “dish” as the technical id of the decision which is used to reference the decision inside the process application.
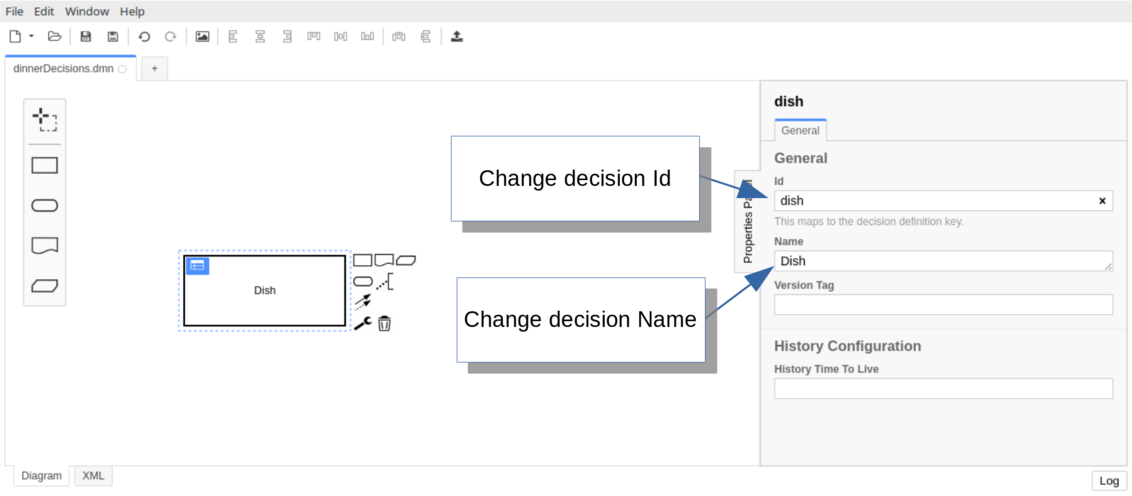
Next, click on the field below and set the name of the decision to “Dish”.
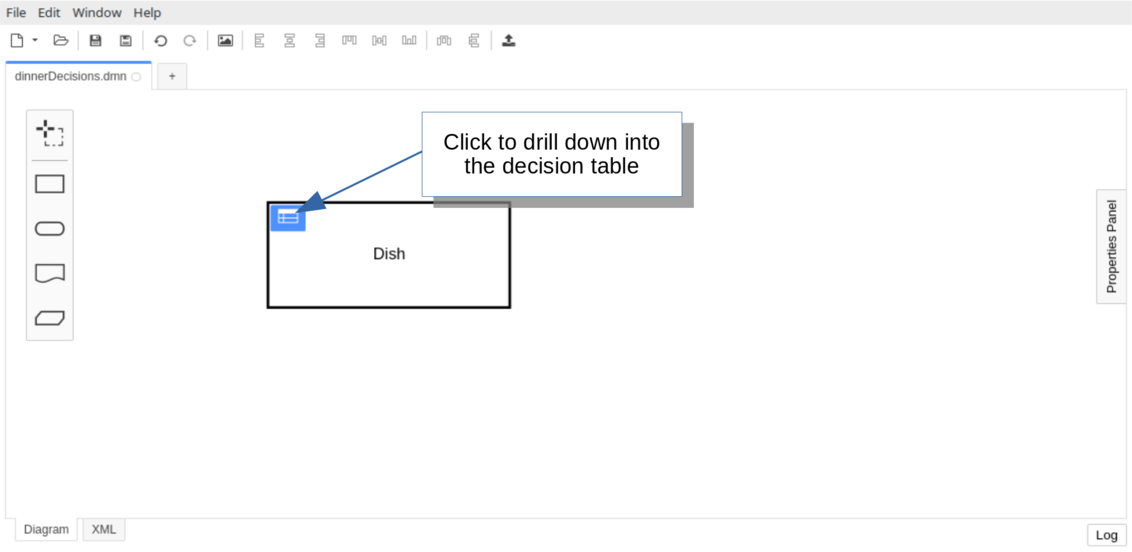
Now drill down into the decision table of the newly created decision by clicking the table icon on top of the decision.
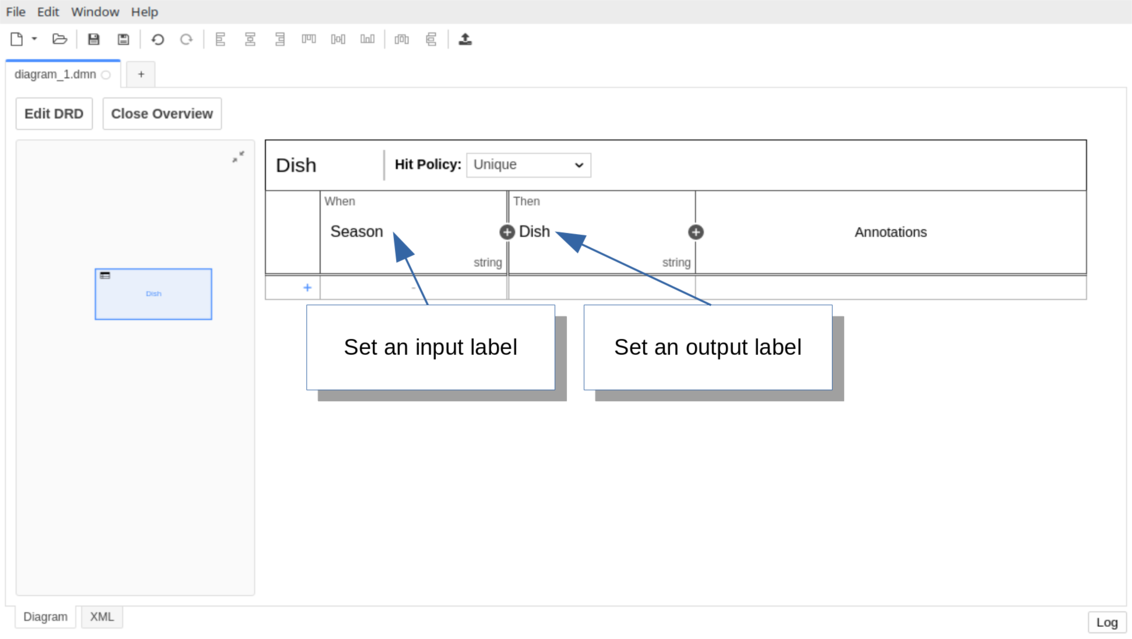
To set the label of the input double-click on the field under “When” and type “Season” in the uppermost field. Same for the output label, double-click on the field under “Then” and type “Dish” in the uppermost field.
Configure the Input Expression and the Output Name
Assuming that the input value for “Season” is provided by a variable with name “season”, the input expression should be “season”.
Double-click on the “Season” field. In the modal menu that pops up, set “season” as expression and close it.
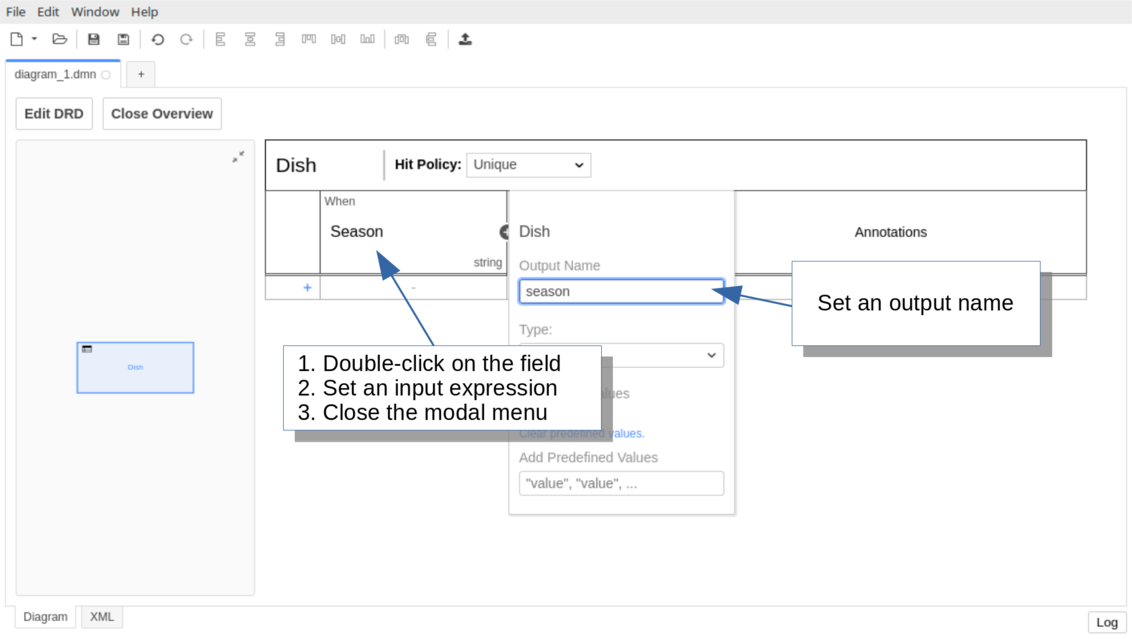
Next, double-click on the “Dish” field and set “desiredDish” as output name.
Configure the Type of the Input and Output
Assuming that the input value for “Season” is provided as String, the type of the input value should be “string”.
Double-click on the “Season” column header. Open the “Type” dropdown-menu in the modal menu and select “string”.
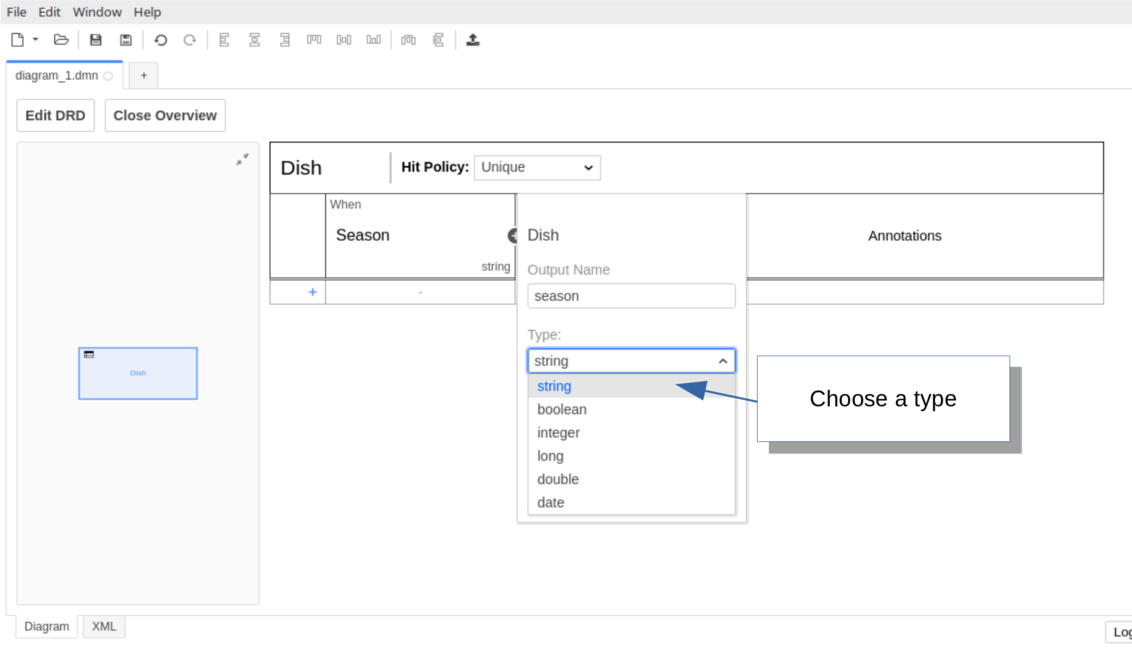
Same for the output type, double-click on the “Dish” column header and choose “string” as type.
Add Rules
Now, add the first rule that specifies that the desired dish for season “Fall” is “Spareribs”.
Click on the “+” button at the bottom of the table or just click anywhere on the last row. In the row that was added, type “Fall” in the input column and “Spareribs” in the output column.
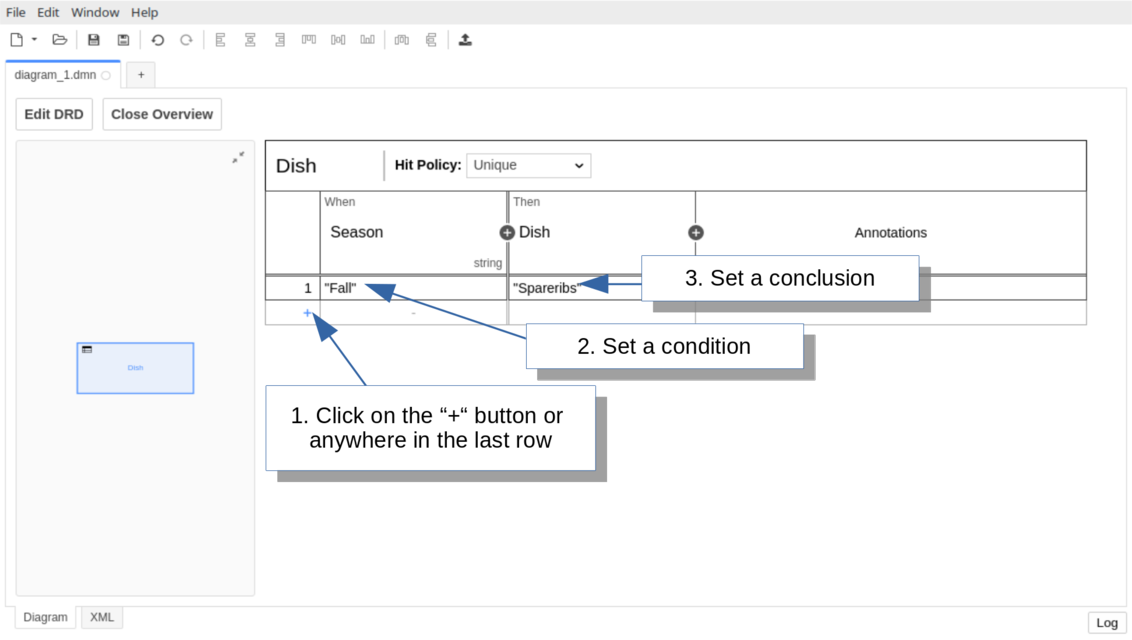
“Fall” is the condition (i.e., input entry) of the rule. It is an expression in FEEL which is applied and then checks if the input value (i.e., the variable “season”) is equal to “Fall”.
“Spareribs” is the conclusion (i.e., output entry) of the rule. It is a simple expression in JUEL and returns the String “Spareribs”.
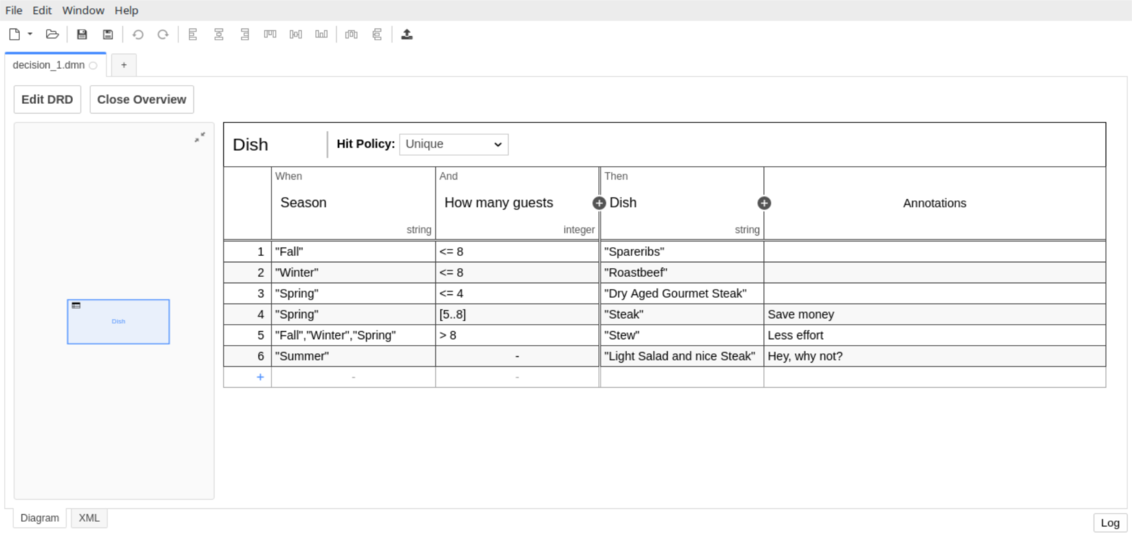
Next, add a second input “How many guests” with the input expression “guestCount” and type “integer”. Fill the table with additional rules for the remaining seasons.
Configure the Hit Policy
Set the hit policy to “UNIQUE”, which specifies that only one rule can match. Verify that the decision table contains only one rule that can match the inputs.
Click on the “Hit Policy” dropdown and choose the hit policy “UNIQUE”.
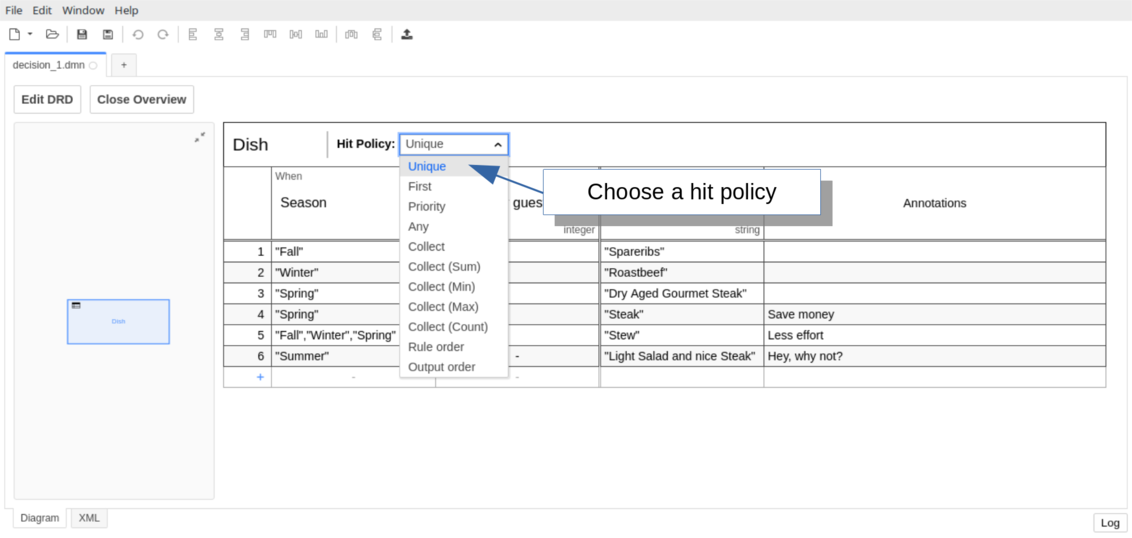
Default Hit Policy
The default hit policy is “UNIQUE”. If your rules are disjunct so only one rule can match then you don’t need to change the hit policy.
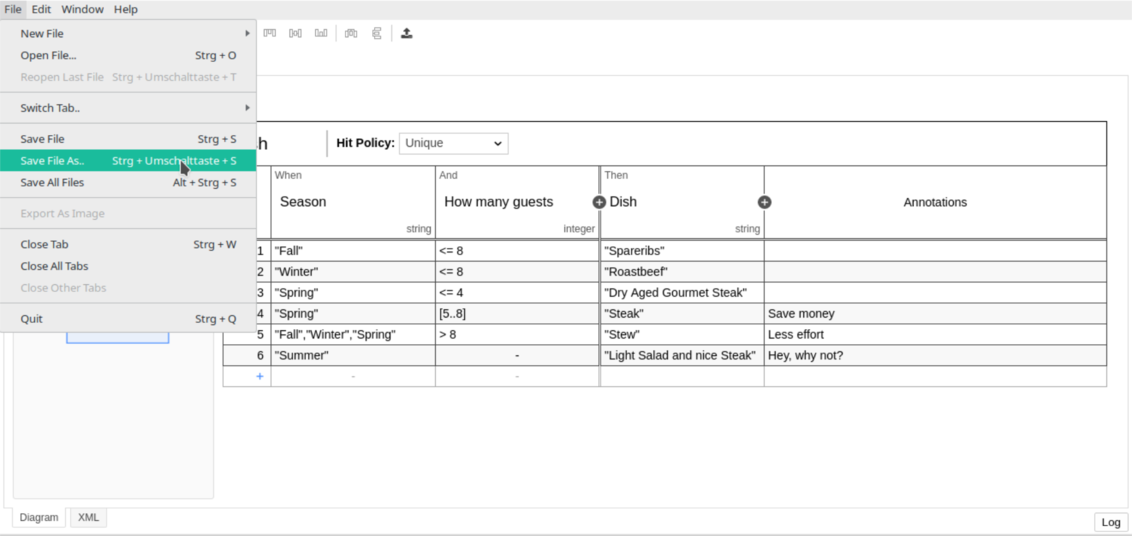
Save the Decision Table
When you are done, save your changes by clicking File > Save File As... In the dialogue that pops up, navigate to the application project directory (by default this is in your Eclipse workspace path). In the project directory, place the model in the src/main/resources folder.
Return to Eclipse. Right-click the project folder and click Refresh. This synchronizes the new DMN file with Eclipse.
For Eclipse to automatically synchronize the workspace with the filesystem, consider configuring auto-sync in eclipse.
Catch up: Get the Sources of Step-3.
Download as .zip or checkout the corresponding tag with Git.
You can checkout the current state from the GitHub repository.
If you have not cloned the repository yet, please execute the following command:
git clone https://github.com/camunda/camunda-get-started-dmn.git
To checkout the current state of the process application please execute the following command:
git checkout -f Step-3Or download as archive from here.