Modeling a BPMN 2.0 Process
In this section you learn how to create your first BPMN 2.0 process with the Camunda Modeler. Start up the Camunda Modeler now.
Create a new BPMN Diagram
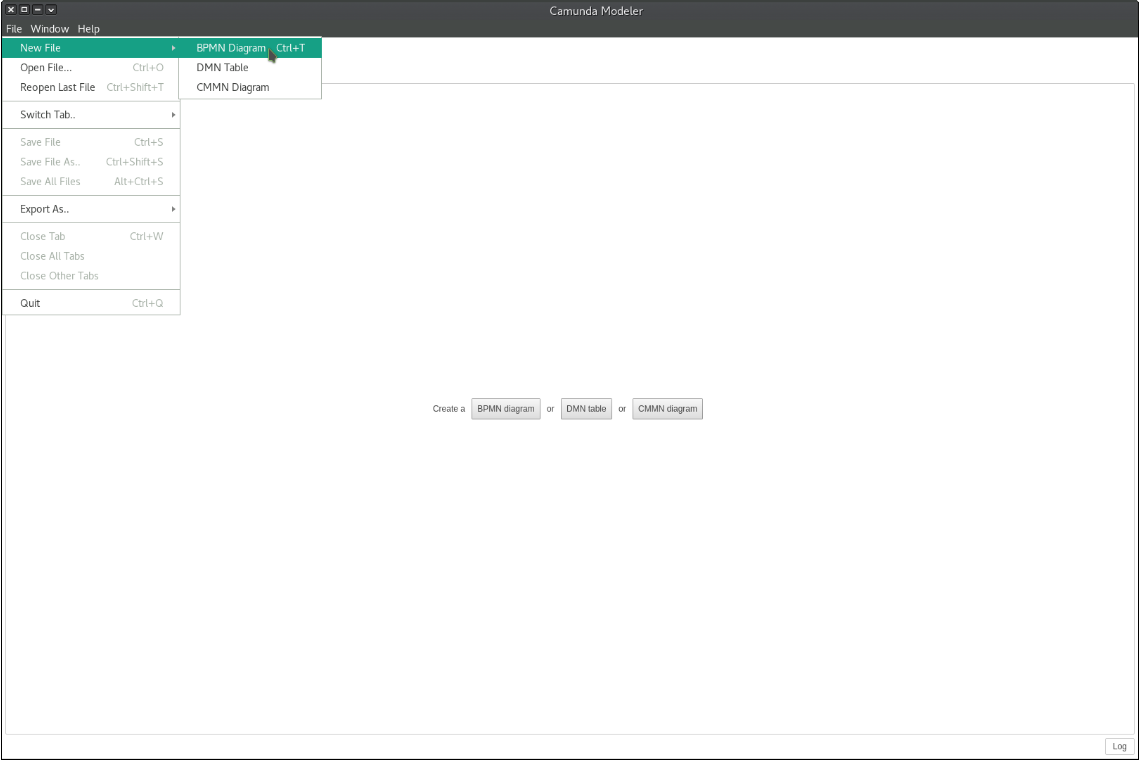
Create a new BPMN diagram by clicking File > New File > BPMN Diagram.
Start with a Simple Process
Start by modeling a simple process.
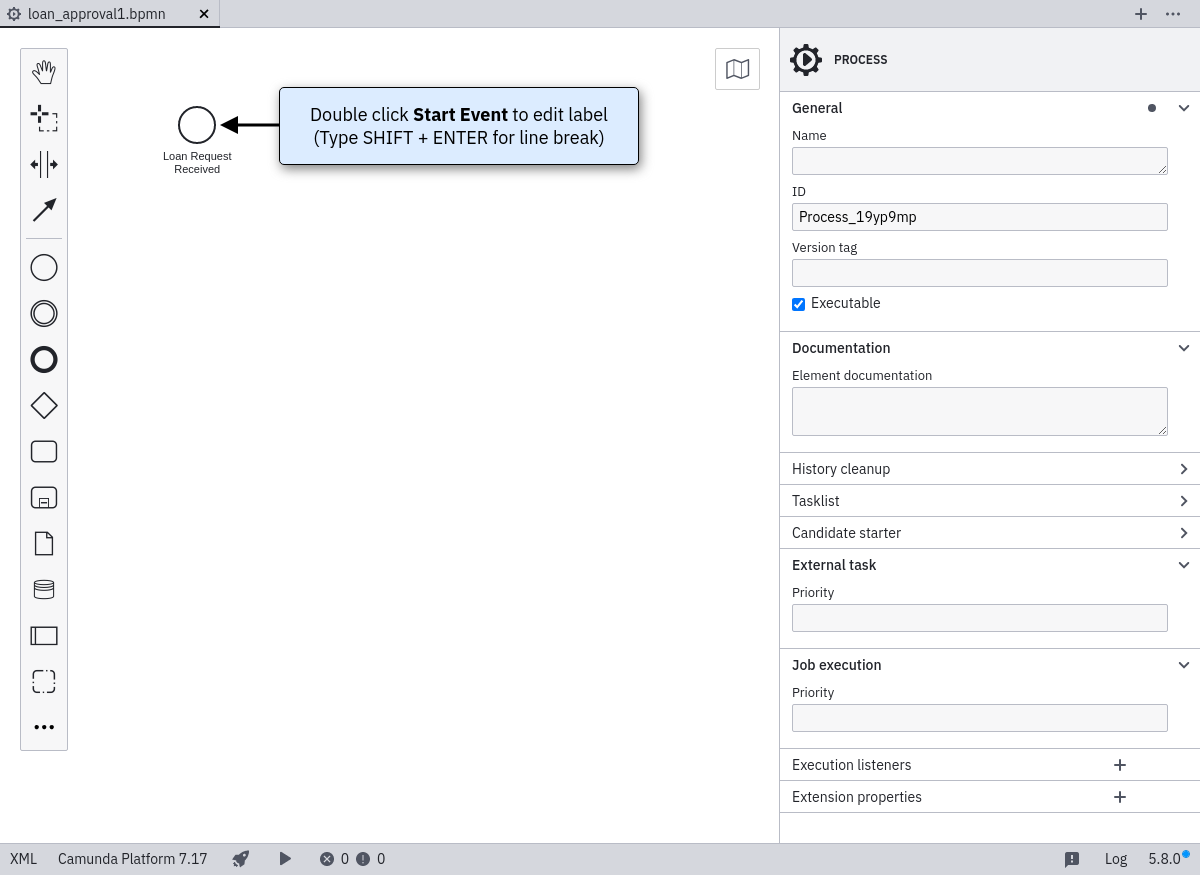
Double-click on the Start Event. A text box opens. Type “Loan Request Received”.
Hint
When editing Labels, you can add line breaks by hitting Shift + Enter.
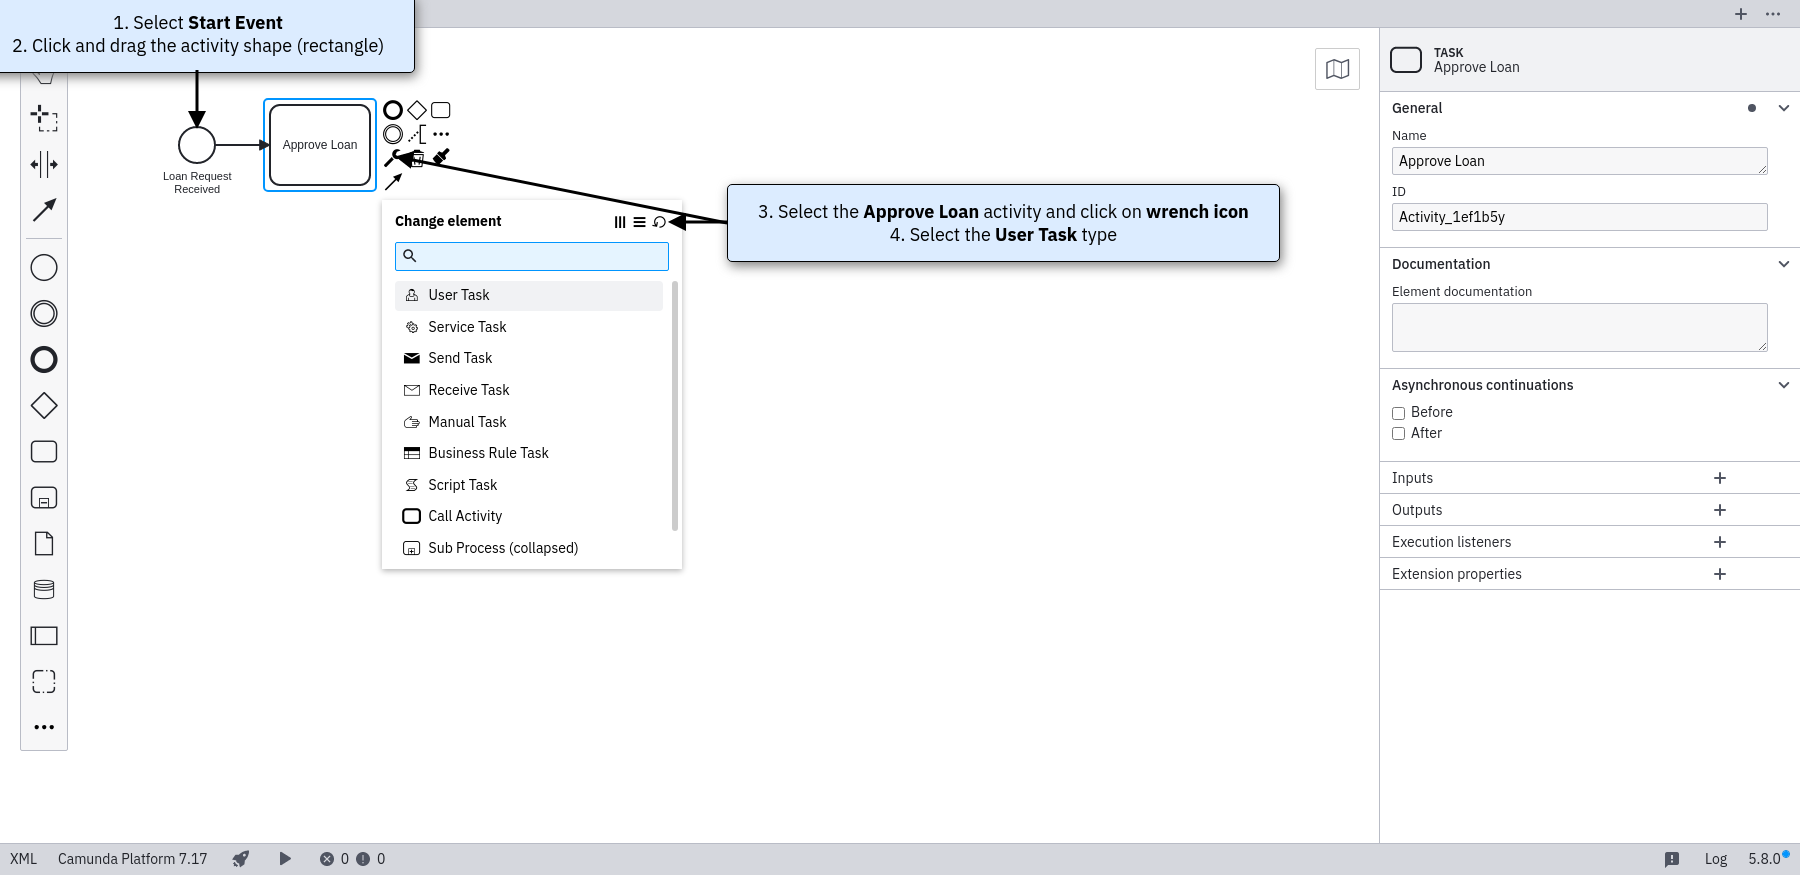
Click on the start event. From its context menu, select the activity shape (rectangle) and drag it to a good position. Name it Approve Loan. Change the activity type to User Task by clicking on it and using the wrench button.
Add an End Event named Loan Request Approved.

Configure a User Task
Next, Open the properties view. If it is not already visible then click on the label on the right hand side of your screen and the properties view will be displayed.
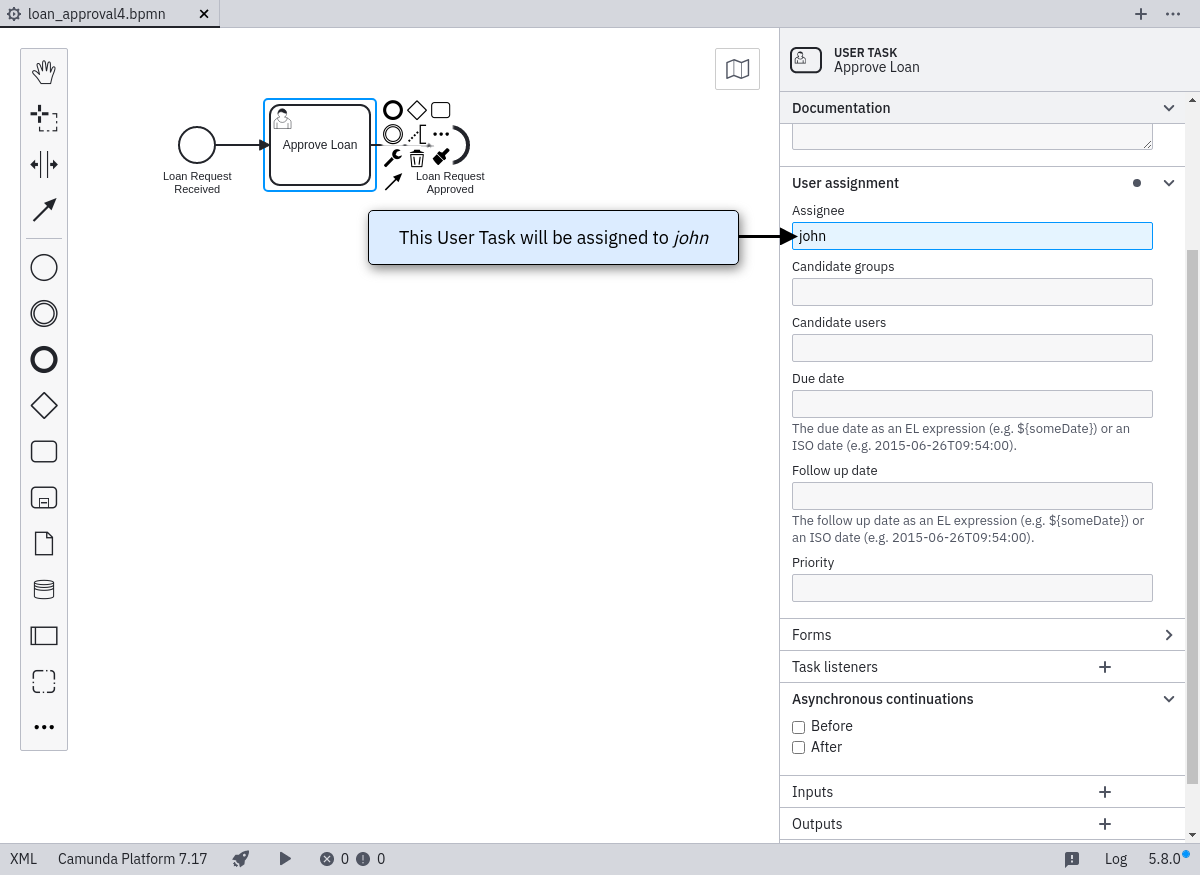
Select the User Task on the canvas. This updates the selection in the properties view. Scroll to the property named Assignee.
Type john.
When you are done, save your changes.
Configure Properties for Execution
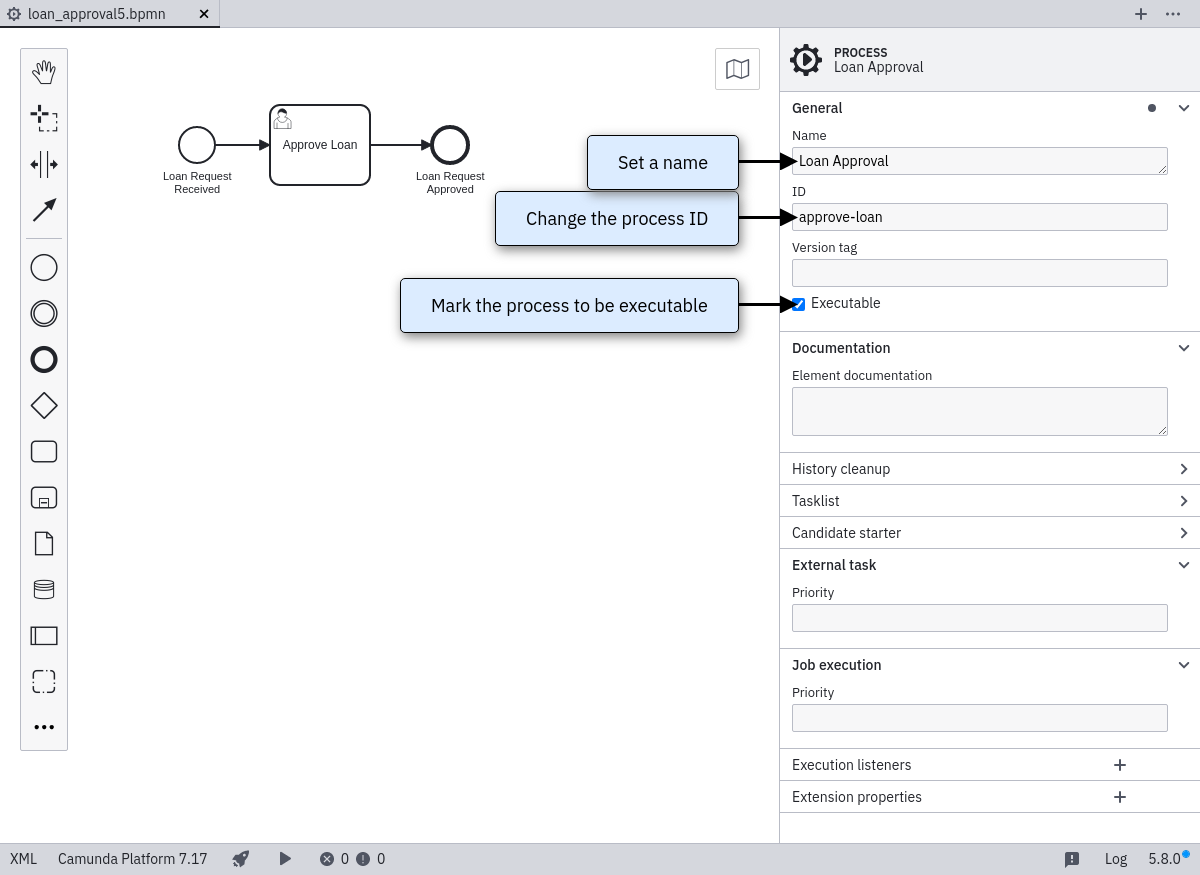
Since we are modeling an executable process, we should give it an ID and set the isExecutable property to true. On the right hand side of the canvas, you find the properties panel. Click on a free spot of the modeling canvas. This displays the properties of the process itself.
First, configure an ID for the process. Type approve-loan in the property field Id. The property ID is used by the process engine as identifier for the executable process and it is best practice to set it to a human-readable name.
Second, configure the Name of the process. Type Loan Approval in the property field Name.
Finally, check the box of the Executable property. If you do not check this box, the process definition is ignored by the process engine.
Save the BPMN Diagram
When you are done, save your changes by clicking File > Save File As... In the dialogue that pops up, navigate to the loan application project directory (by default this is in your Eclipse workspace path). In the project directory, place the model in the src/main/resources folder.
Return to Eclipse. Right-click the project folder and click Refresh. This synchronizes the new BPMN file with Eclipse.
Adjust the deployment descriptor file
Adjust the META-INF/processes.xml deployment descriptor file by adding the BPMN process resource:
<?xml version="1.0" encoding="UTF-8" ?>

<process-application
        xmlns="http://www.camunda.org/schema/1.0/ProcessApplication"
        xmlns:xsi="http://www.w3.org/2001/XMLSchema-instance">

  <process-archive name="loan-approval">
    <process-engine>default</process-engine>

    <resource>loan-approval.bpmn</resource>

    <properties>
      <property name="isDeleteUponUndeploy">false</property>
      <property name="isScanForProcessDefinitions">true</property>
    </properties>
  </process-archive>

</process-application>
Catch up: Get the Sources of Step-3.
Download as .zip or checkout the corresponding tag with Git.
You can checkout the current state from the GitHub repository.
If you have not cloned the repository yet, please execute the following command:
git clone https://github.com/camunda/camunda-get-started-java.git
To checkout the current state of the process application please execute the following command:
git checkout -f Step-3Or download as archive from here.