Editing DMN in Camunda Modeler
Quickstart
Create new DMN Decision Requirement Diagram
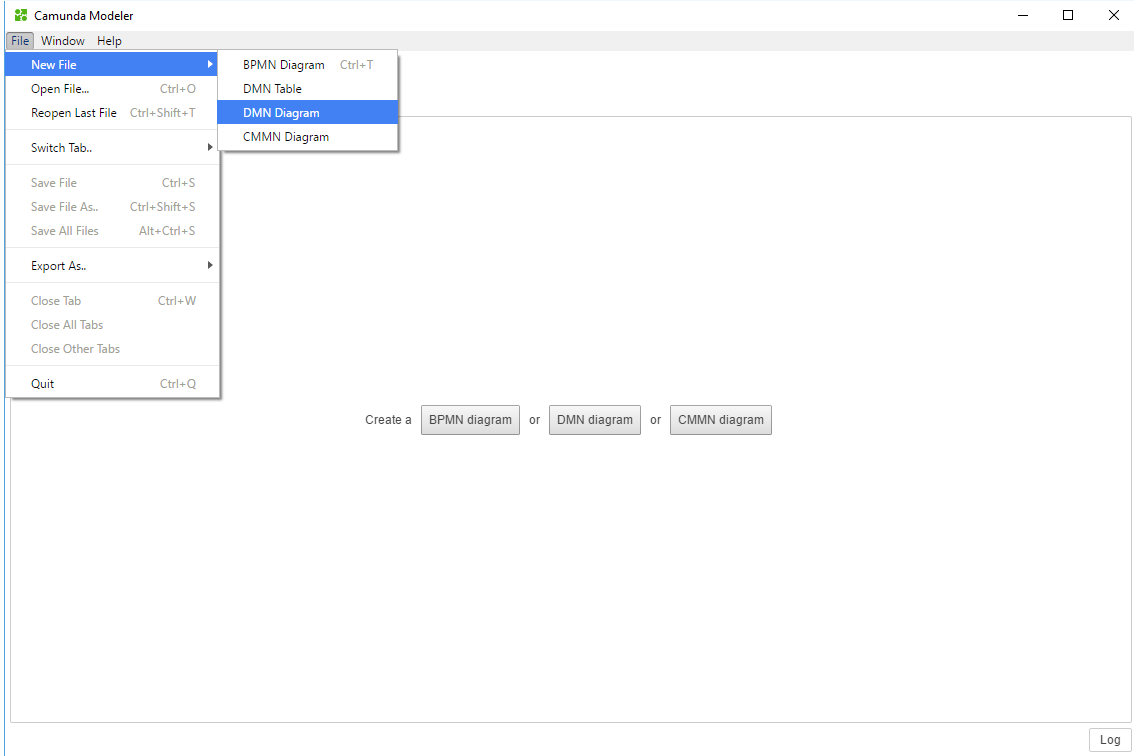
To start modeling, create a new DMN 1.3 diagram by selecting File / New File / DMN Diagram in the top-level menu.
Start Modeling

Now you can start to create a DMN 1.3 model. Add the desired elements from the palette on the left hand side by dragging and dropping them onto the diagram canvas. Alternatively, you can add new elements by using the context menu that appears when you select an element in the diagram. Using the wrench icon in the context menu, you can change the type of an element in place.
Demo

The demo above shows how to model a decision table. After creating a decision and morphing it to a decision table, you can start editing the table by clicking the overlay on the upper left corner of the decision.
Save a Diagram

To save your state of work, click File / Save File As… in the top-level menu. Then select a location on your file system to store the diagram in the DMN 1.3 XML format. You can load that file again by clicking File / Open File….
DMN Coverage
The Camunda Modeler covers the following elements:
- Decision (Tables and Literal Expressions)
- Input Data
- Knowledge Source
- Business Knowledge Model
Decision Tables
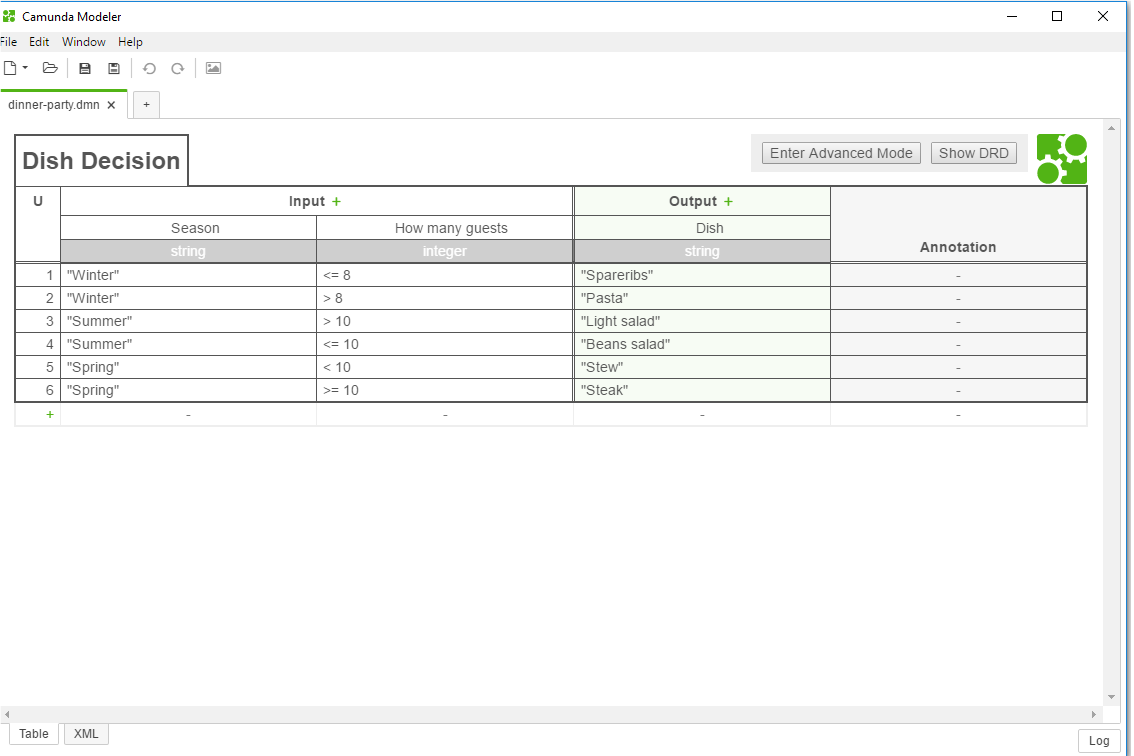
Now you can start to edit the DMN decision table.
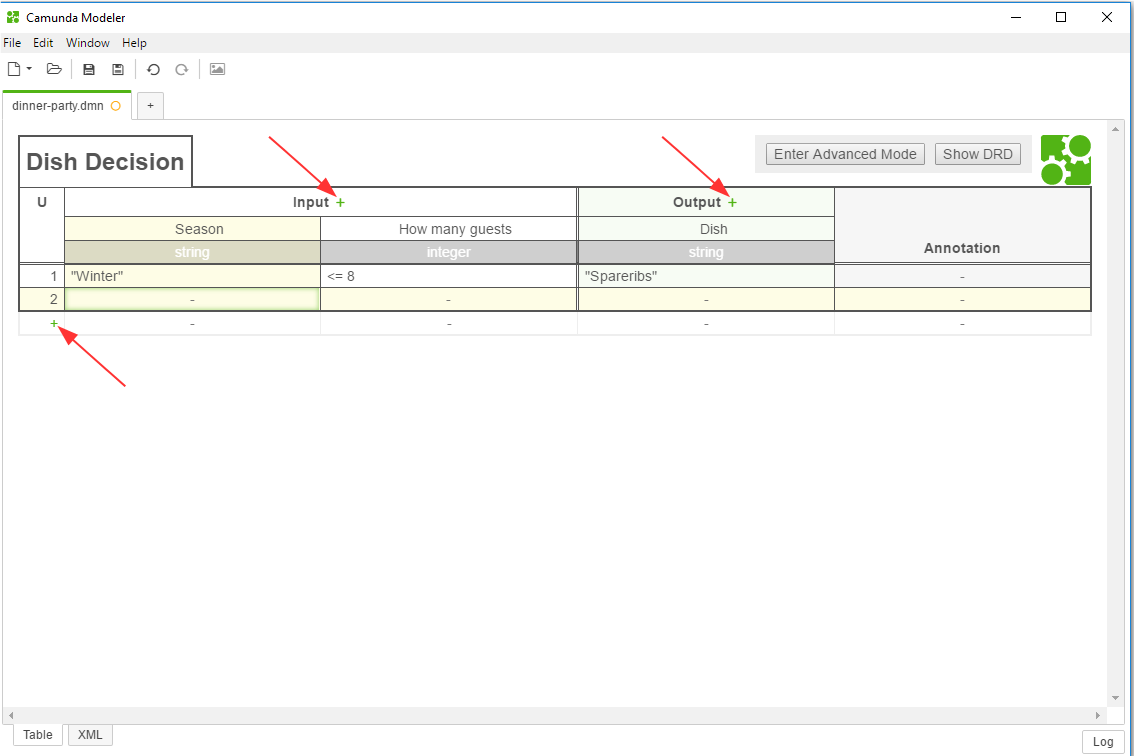
Add Input, Output and Rule elements by clicking the plus signs. Edit a table cell by clicking on it. Alternatively, the tabulator key can be used to walk through the table cells.
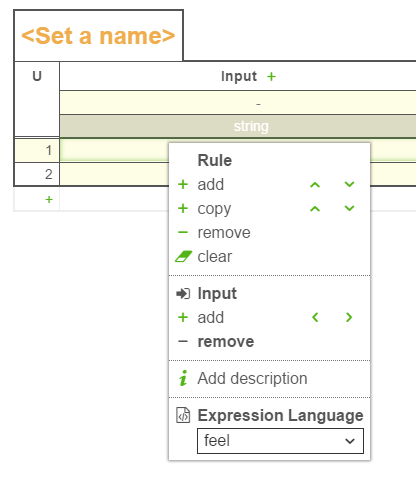
Delete a rule or a column, copy or insert a new rule by right clicking in the cell:
You can start modeling a Decision Requirement Diagram by clicking the Show DRD button, without losing the progress made on the decision table.
Literal Expressions
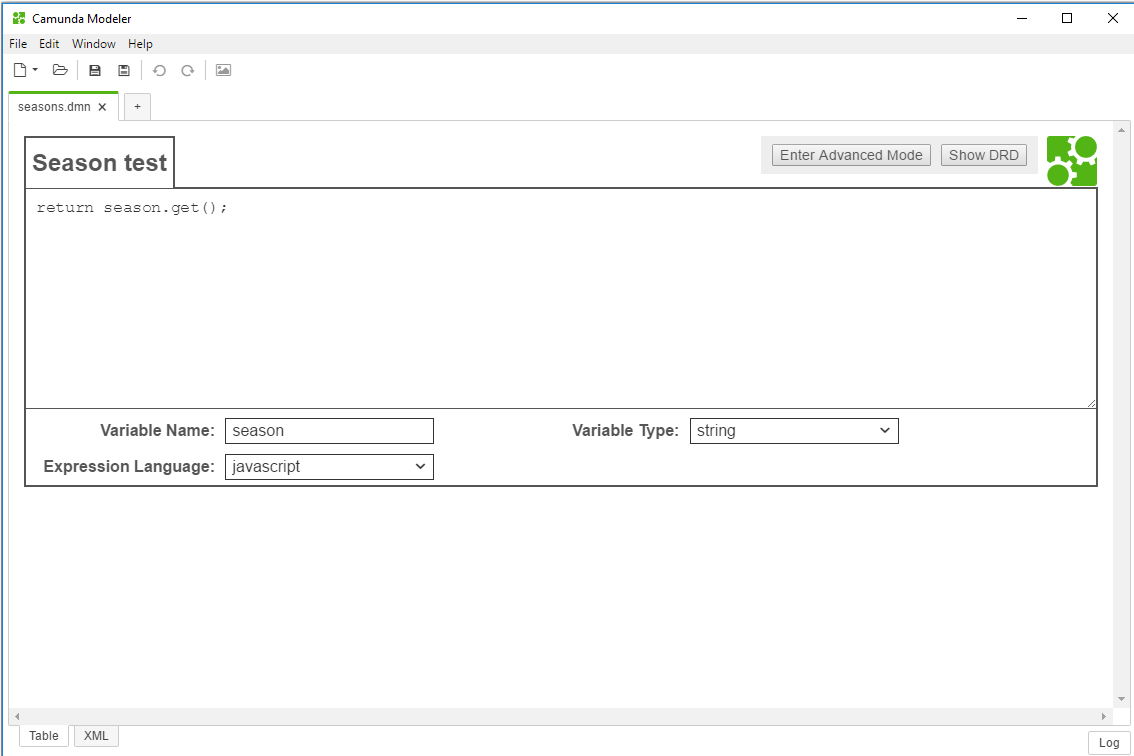
You can also edit Literal Expressions. It uses the same drill down approach as Decision Tables.